As the days shorten and the chill of autumn cloaks the Smoky Mountains, my thoughts flicker back to Halloween nights past. I remember one particular evening with fondness, where my kitchen danced with the warm glow of fairy lights and the air was filled with the delightful aroma of baking. That year, I decided to whip up Halloween Oreo Cake Bars for the neighborhood trick-or-treaters, a fun little twist on a family favorite.
The moment I cracked open that iconic packaging of Oreos, the excitement surged through me. I could already envision the chocolatey goodness mixed with that rich, buttery cake, accented with eerie decorations—perhaps some ghostly frosting and sprinkles that crunched on my teeth. There’s something so magical about this time of year, where every bite captures the joy of childhood, and those who gathered around my table could literally taste the love and laughter interwoven into each morsel. Watching friends and family delight in these Halloween Oreo Cake Bars felt like casting a spell. With every bite, memories of my sweet grandmother came rushing back, reminding me that the best recipes are often rooted in joy and shared moments.
As we dive into this festive recipe, let me take you on a delicious journey of flavors, textures, and familial love that makes Halloween Oreo Cake Bars a true crowd-pleaser and a celebration of fall.
Flavor and Popularity
The Unique Flavor Profile of Halloween Oreo Cake Bars
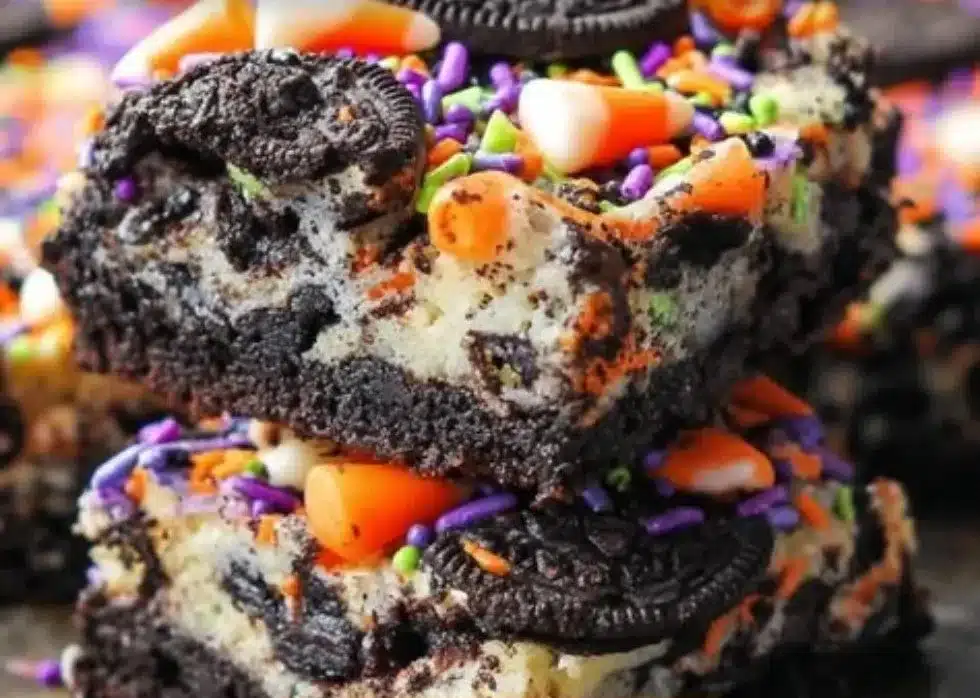
Halloween Oreo Cake Bars strike a delightful balance between rich chocolate and creamy sweetness. Each bite offers a soft and moist cake base that cradles the unique texture of crumbled Oreos, creating a bite that is both chewy and decadently buttery. The chocolate cake melds beautifully with the cream filling of the Oreos, resulting in an almost nostalgic flavor reminiscent of childhood treats and carefree celebrations. When you take that first bite, hints of vanilla, cocoa, and just the right amount of sweetness swirl together and tantalize your taste buds.
Whether you’re dressing them up with vibrant orange frosting or adding a sprinkle of glitter to make them irresistibly festive, these cake bars stay true to the spirit of Halloween. It’s not just another sugary treat; it’s a canvas to express your creativity. You can easily customize the decorations based on your themes, bringing a personal touch that elevates each dessert. These cake bars are more than just tasty—they offer a burst of excitement at every Halloween gathering.
Why This Recipe Is a Family Favorite and Crowd-Pleaser
What makes Halloween Oreo Cake Bars stand out is how quickly they disappear from the table. Friends and family often serenade these treats with praise as they savor each decadent bite. I can’t help but smile when I remember my niece’s wide eyes the first time she tried them—her chorus of “Maggie, these are the best!” still echoes in my heart.
The beauty of this recipe is its versatility; it appeals to both kids and adults, bridging generations with nostalgia. It’s a fantastic way to get everyone involved—kids can help decorate, while adults can enjoy reminiscing over their childhood tricks and treats. Baking together becomes a cherished tradition, creating laughter and love to fill your home.
Let’s break down the essential ingredients that will help you craft these delightful Halloween treats.
Ingredients and Preparation
Essential Ingredients and Possible Substitutions
To create scrumptious Halloween Oreo Cake Bars, you’ll need a handful of essential ingredients:
- Oreo Cookies: The star of the show! Use regular or family-size packs for extra crumbles.
- Butter: Opt for unsalted butter for a rich, creamy base that enhances flavor—perfectly melting into the cake.
- Sugar: Granulated sugar ensures sweetness, but brown sugar can add a touch more moisture.
- Eggs: Room temperature eggs help bind everything together while adding moisture.
- All-Purpose Flour: This gives structure to your cake bars, ensuring they hold shape.
- Baking Powder and Baking Soda: These leavening agents create a fluffy texture.
- Milk: A splash of milk enriches the batter—feel free to use whole or low-fat based on your preference.
- Vanilla Extract: For that warm, comforting aroma that makes any treat taste special.
- Frosting (optional): Use store-bought orange or black frosting for a festive flair, or whip up a simple buttercream at home.
If you need substitutions, don’t worry! You can swap in gluten-free flour if you’re catering to dietary needs. If you want a deeper chocolate flavor, consider adding cocoa powder to the batter—trust me, it makes a delightful difference. Need a vegan option? Substitute eggs with applesauce or flaxseed meal.
Step-by-Step Recipe Instructions with Tips
Now let’s take a step-by-step journey to create these fabulous treats. Gather your ingredients and follow along!
Preheat the Oven: Start by heating your oven to 350°F (175°C). Grease a 9×13-inch baking pan or line it with parchment paper for easy removal.
Prepare the Oreos: Crush about 15-20 Oreos in a ziplock bag, creating coarse crumbs. You want some texture, so don’t pulverize them into dust—leave a few chunky pieces for that special crunch.
Mix Wet Ingredients: In a large bowl, cream together the softened butter and sugar until light and fluffy, about 3-4 minutes. Add in the eggs one at a time, beating after each addition, followed by the vanilla extract.
Incorporate Dry Ingredients: In a separate bowl, whisk together the flour, baking powder, and baking soda. Gradually add this mixture to the wet ingredients, alternating with the milk. Stir gently until just combined—watch that you don’t overmix!
Add the Oreos: Fold the crushed Oreos into the batter, making sure to distribute them evenly.
Bake: Pour the batter into the prepared baking pan and spread it out evenly. Bake for 25-30 minutes or until a toothpick inserted in the center comes out with a few moist crumbs.
Cool and Decorate: Remove the pan from the oven and let it cool completely on a wire rack. Once cool, frost with orange or black frosting and add sprinkles or edible ghost decorations for extra flair.
Slice and Serve: Cut into bars and watch them vanish before your eyes as you share them with family and friends.
Cooking Techniques and Tips
How to Cook Halloween Oreo Cake Bars Perfectly
Perfecting your Halloween Oreo Cake Bars involves maintaining moisture while achieving that irresistible cake texture. Remember these tips:
- Ensure your ingredients are at room temperature. This helps the batter come together smoothly, giving you a light and fluffy cake.
- Don’t overmix your batter after adding the flour; it could result in dense bars.
- Keep an eye on the baking time as ovens can vary. Start checking around the 25-minute mark.
Common Mistakes to Avoid
While making these cake bars, avoid these common rookie errors:
- Using Cold Ingredients: Cold butter and eggs can lead to uneven mixing—always start with room temperature.
- Not Measuring Accurately: Baking is a science! Be precise with your measurements to ensure the correct texture.
- Skipping the Cooling Step: Allowing the cake to cool completely prevents frosting from sliding off and allows the flavors to bloom.
Health Benefits and Serving Suggestions
Nutritional Value of Halloween Oreo Cake Bars
While Halloween Oreo Cake Bars are certainly a treat, they do have elements that contribute to a balanced indulgence. Oreos contain sugar and fat, but they also offer enjoyable flavors that create wonderful memories. As with all desserts, moderation is key. Share deliciousness with friends, and it becomes a wholesome experience.
Best Ways to Serve and Pair This Dish
To elevate your Halloween celebrations, these cake bars can be paired with:
- Milk: A classic accompaniment—always a hit with chocolate treats.
- Coffee or Tea: A warm beverage complements the sweetness perfectly, inviting guests to linger.
- Seasonal Fruits: Sliced apples or pears add a refreshing contrast to the rich bars.
Alternatively, you can create a dessert board, arranging the cake bars alongside candies, chocolates, and other themed treats for a visually enticing centerpiece.
FAQ Section
What type of mushrooms are best for Halloween Oreo Cake Bars?
Mushrooms aren’t traditionally included in Halloween Oreo Cake Bars, but if you want to get creative, consider using chocolate-flavored mushrooms for decor. Simply stick them on top as part of the festive Halloween theme!
Can I use dried garlic instead of fresh?
While garlic is not an ingredient in these cake bars, if you were to use it in a different recipe, dried garlic can be a suitable alternative—just remember that it’s more concentrated, so use less!
How do I store leftover Halloween Oreo Cake Bars?
Keep your leftover bars in an airtight container at room temperature for up to three days. If they last that long!
Can I freeze Halloween Oreo Cake Bars?
Absolutely! You can freeze the cake bars for up to three months. Just wrap them well in plastic wrap and store them in an airtight container. When you’re ready to enjoy, let them thaw in the fridge or at room temperature.
As we near the end of our sweet adventure, I hope you feel inspired to create your own batch of Halloween Oreo Cake Bars.
Conclusion
If you’re like me, Halloween evokes memories of warmth and laughter, and every treat baked with love strengthens those sentiments. There’s something comforting about transforming simple ingredients into delightful creations that fill your home with joy. Trust me, you’ll want to make this recipe again and again, not just for its deliciousness but for the heartwarming memories you’ll create along the way. So roll up your sleeves, gather your loved ones, and embark on this delightful baking mission. Happy Halloween!
Print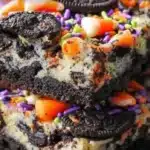
Halloween Oreo Cake Bars
- Total Time: 45 minutes
- Yield: 12 servings 1x
- Diet: Vegetarian
Description
Delightful cake bars featuring rich chocolate cake and crumbled Oreos, perfect for Halloween celebrations.
Ingredients
- 15–20 Oreo cookies, crushed
- 1/2 cup unsalted butter, softened
- 1 cup granulated sugar
- 2 large eggs, room temperature
- 1 cup all-purpose flour
- 1 tsp baking powder
- 1/2 tsp baking soda
- 1/4 cup milk
- 1 tsp vanilla extract
- Frosting (optional, black or orange)
- Sprinkles or edible decorations (optional)
Instructions
- Preheat the oven to 350°F (175°C) and prepare a 9×13-inch baking pan with grease or parchment paper.
- Crush the Oreo cookies in a ziplock bag to create coarse crumbs.
- Mix the butter and sugar in a large bowl until light and fluffy, about 3-4 minutes. Add eggs one at a time, followed by vanilla.
- Incorporate the flour, baking powder, and baking soda into the wet mixture, alternating with milk until just combined.
- Fold the crushed Oreos into the batter evenly.
- Pour the batter into the prepared pan and spread evenly. Bake for 25-30 minutes or until a toothpick comes out with a few moist crumbs.
- Cool the bars on a wire rack until completely cool, then frost and decorate if desired.
- Slice into bars and serve.
Notes
Room temperature ingredients help achieve a fluffy texture. Don’t overmix the batter after adding flour.
- Prep Time: 15 minutes
- Cook Time: 30 minutes
- Category: Dessert
- Method: Baking
- Cuisine: American
Nutrition
- Serving Size: 1 bar
- Calories: 200
- Sugar: 12g
- Sodium: 150mg
- Fat: 8g
- Saturated Fat: 4g
- Unsaturated Fat: 4g
- Trans Fat: 0g
- Carbohydrates: 30g
- Fiber: 1g
- Protein: 2g
- Cholesterol: 30mg
Keywords: Halloween, Oreo Cake Bars, dessert, chocolate cake, festive treats